

VSCode Extension User Guide#
Using the Extension#
Selecting a project#
When you first open a software project, the Lattix VSCode Extension will prompt you to select the Lattix Architect project LDZ file:

If you already have an LDZ file for the project you are working on, specify its location.
If not, you will need to follow the steps outlined in Create a New Project within Lattix Architect. There is no way to create an LDZ file from within the VSCode Extension.
The extension will attempt to match the source files in the LDZ file with the source files in the current directory. This means that the LDZ file does not need to be created on the host machine, but could be downloaded from a pipeline, for example.
The location of the LDZ file is saved in a configuration file in the current project
under ./.lattix/ldzpath.
The Impact Explorer#
The Lattix VSCode Extension provides an Impact Explorer view to your VSCode IDE. The Impact Explorer allows you to view the Up and Downstream dependencies of selected partitions identified by Lattix.
This view is located at the bottom of your screen, alongside Problems, Output, Terminal etc.
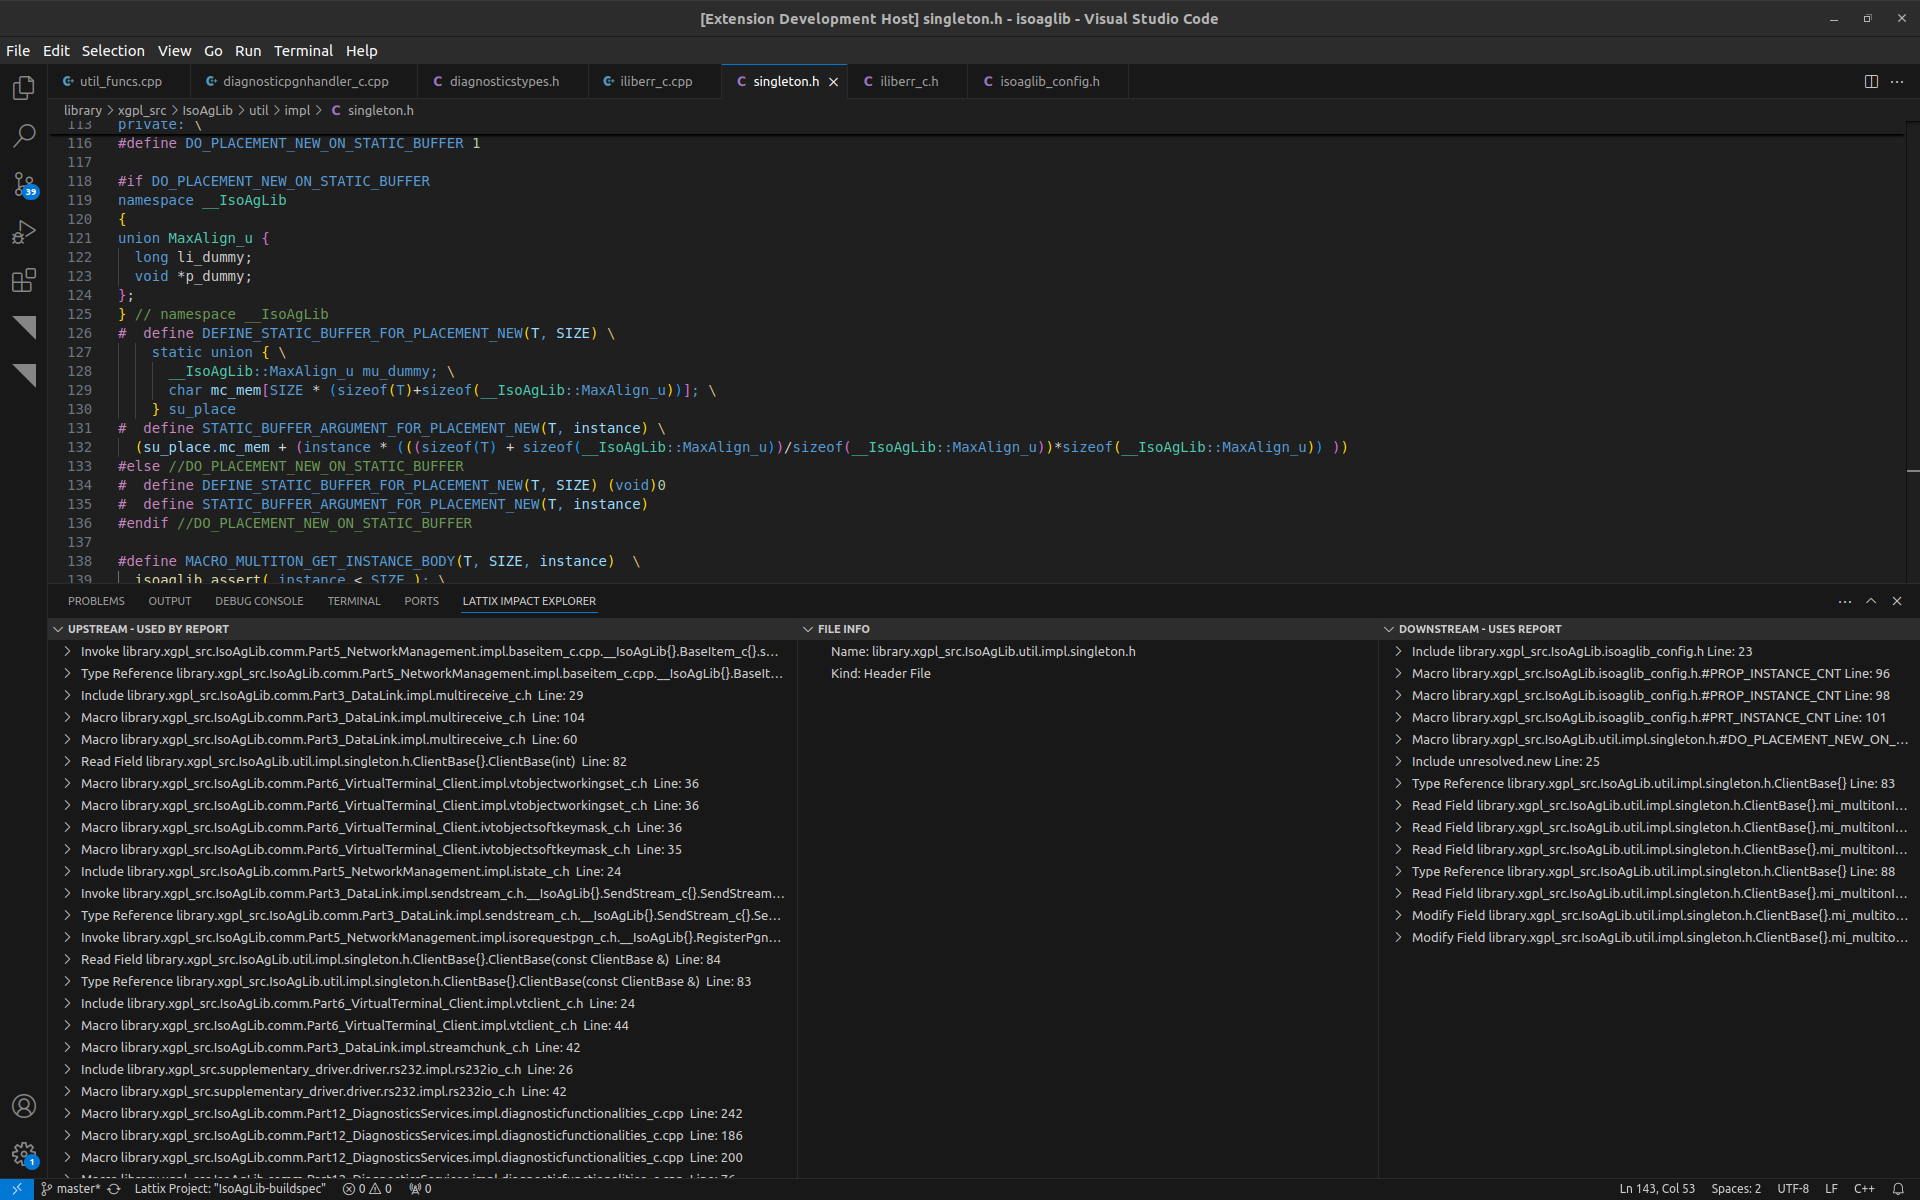
The Lattix Impact Explorer is split into three different panels:
Upstream - Used By Report
File Info
Downstream - Uses Report
File Info Panel#
The File Info panel shows information about the currently selected file or tag. When a Tag is selected, only the tag name is displayed. When a file is selected, the filename and the type of file (e.g. Header file, Source file) are displayed.
Upstream - Used By Panel#
The Upstream panel shows all the items which are used by the selected source file or tag.
One line is given per dependency edge (i.e. per line of code).
Clicking on one of these dependencies, where applicable, will open and highlight that line of code in the code editor of VSCode.
Expanding the tree (by clicking on the chevron on the left) will expand the dependencies by one level, i.e. showing the Upstream dependencies for that element.
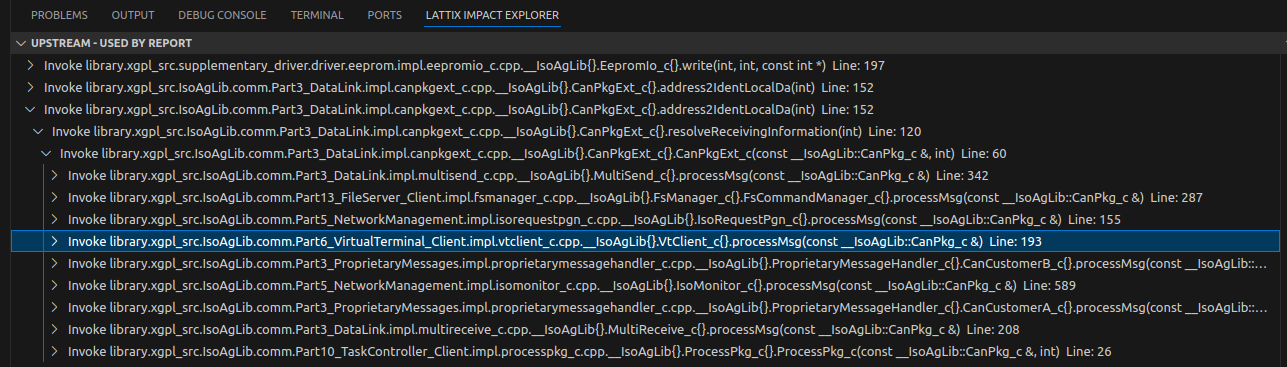
Each line in the up or downstream panels contains the type of dependency, the file or function name, and the line number (if applicable).
Downstream - Uses Panel#
The Downstream panel is much like the Upstream view, however it displays each of the items that uses the selected source file or tag.
Using the Impact Explorer#
Open the explorer and mouse-over the central File Info panel:
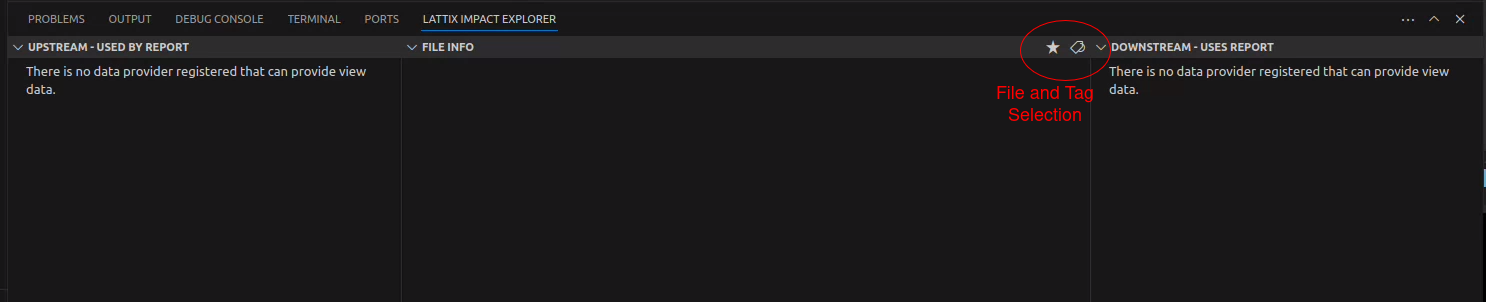
Two icons will appear:
A star icon, used to select the currently open source file for impact analysis.
A tag icon, used to select a Tag for impact analysis.
Use one of these icons to select either a source file or a tag for impact analysis.
Alternatively you can right click a source file and choose Lattix -> Impact Analysis to choose a file for impact analysis.
Once you have selected a tag or file for analysis, you can browse the Upstream and Downstream panels to explore the dependencies.
Tags#
Tags are names or labels that can be attached to a subsystem. Any tags that you already have in your Lattix project will be available for analysis in the Lattix VSCode Extension.
From within VSCode, you can also tag a file or tag a member with a new or existing tag.
Tagging a file#
Right click the file you would like to tag
Go to Lattix -> Tag File
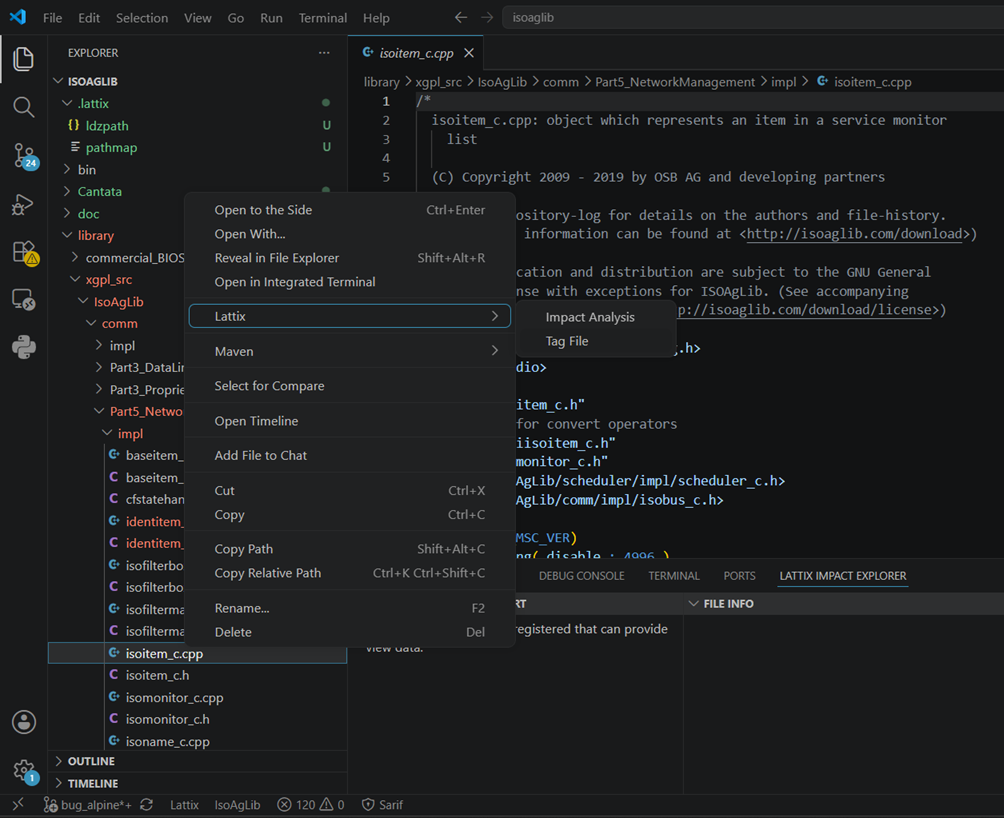
Choose an existing tag or create a new one
To confirm that the file is now tagged, you can click away from it and then back to it in the file explorer, and you will see a pop-up message, showing which tags are on the file and/or its contents:

Tagging a member#
Right click the member you would like to tag
Go to Lattix -> Tag Member
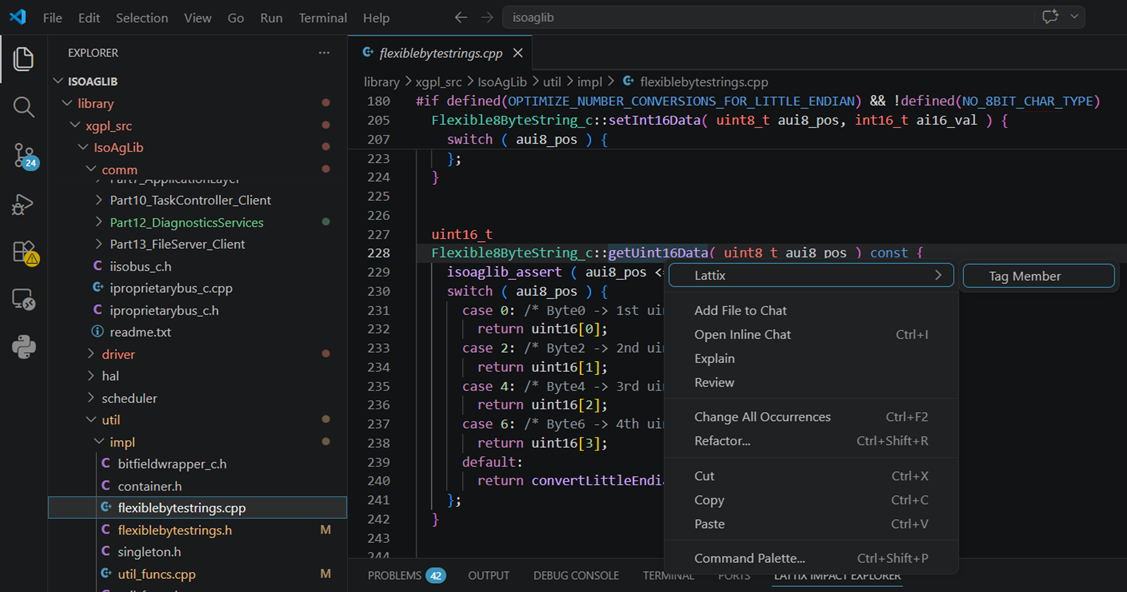
Select the item you wish to tag from the provided list
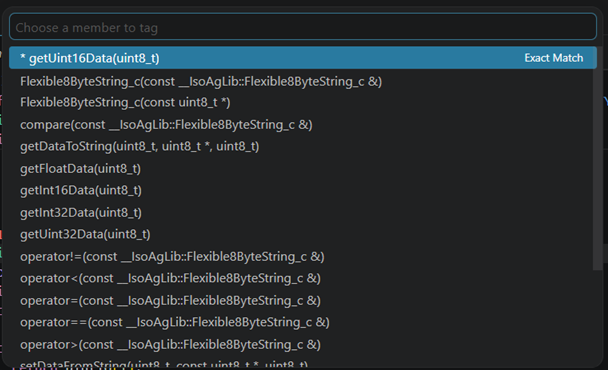
Choose an existing tag or create a new tag
The tag will then appear to the right of the code, with a Lattix icon in the tray on the left:
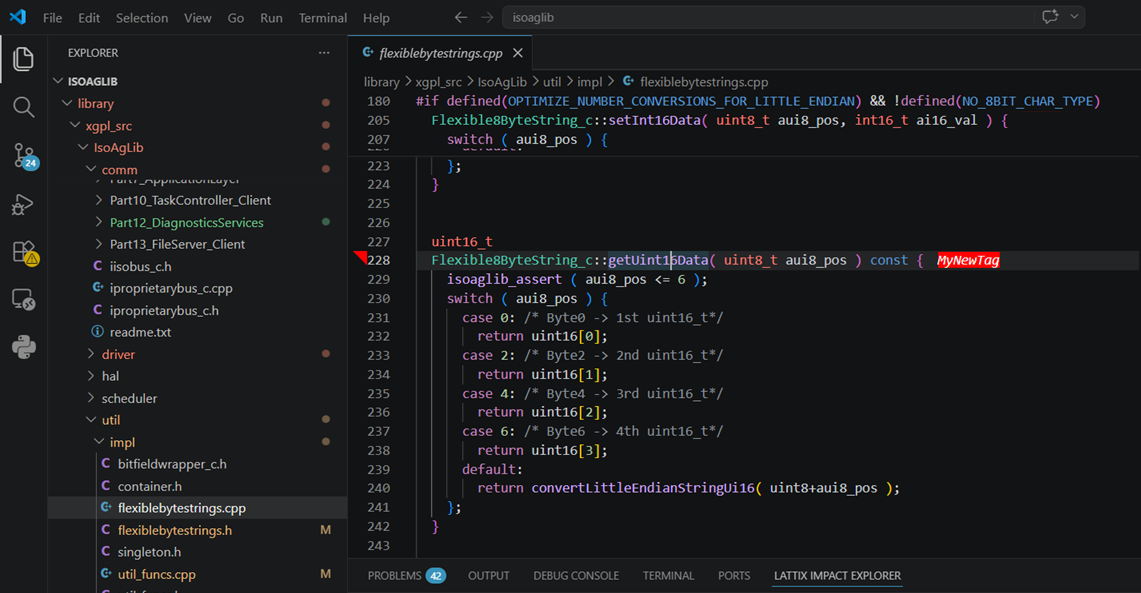
You can then see the impact analysis of the tagged items by following the steps in Using the Impact Explorer and selecting your tag.
Rule Violations#
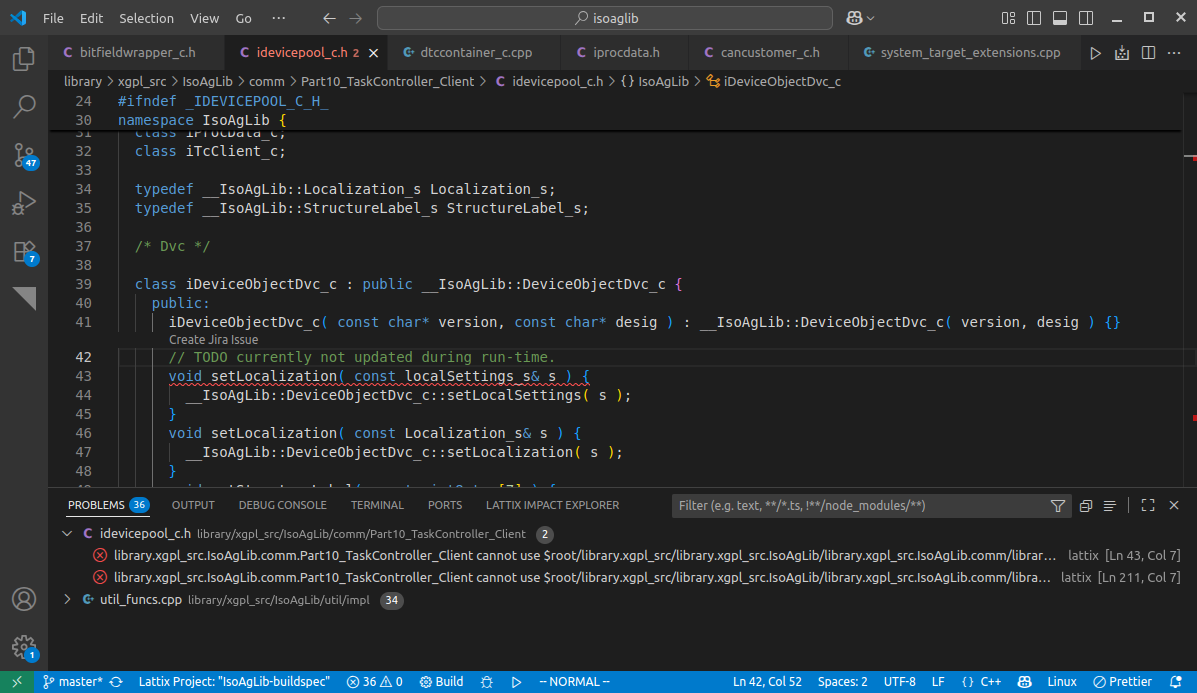
With line number information included in the Lattix project, the VSCode Extension can display the specific lines where these “cannot use” violations occur. Rule violations are shown as squiggly underlines in the code editor, and also in the Problems Panel of VSCode. Clicking on a violation in the problem panel will open the relevant file and highlight the line of code.
For projects with a large number of rule violations, the extension can be configured to load the rule violations sequentially as you open files. This is enabled in the extension settings with the option “Load All Rule Violations”.
Switching Projects#
If you have more than one LDZ file for your software project, you can change which one is currently active by clicking the Lattix project name in the status tray:
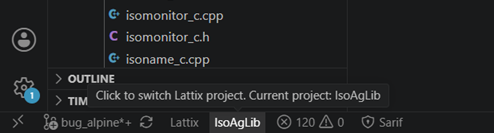
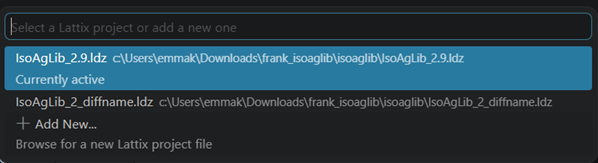
Using AI#
The Lattix MCP server can be used within VSCode. For more information, see Use of AI.
Troubleshooting#
Enabling Debug Logging#
If you encounter any problems with the Lattix VSCode Extension, you can enable debug logging.
To enable debug logging, increase the VSCode logging level to Trace by using Ctrl + Shift + P
and searching for Developer: Set Log Level.
The log can be opened from the command palette (Ctrl + Shift + P) and searching for Open Lattix Log File.
Note
The logs can also be opened from the Output panel, by selecting Lattix from the dropdown menu.
Matching project files#
There may be a problem with the extension recognising where the source files in the lattix project are located in your workspace. This occurs primarily when the project was built not on the local machine, such as in a pipeline. Should this happen, the message “No match between ldz atoms and local files found” will be displayed.
If this occurs, you will need to specify the mapping between the ldz filepath and the local filepath.
Create a file in the .lattix workspace called pathmap of the form:
// /home/USER/projects/isoaglib/.lattix/pathmap

{
    "from":"/builds/lattix1/",
    "to":"/home/USER/projects/"
}
Where "from" is the path of the source files in the ldz file, and "to" is the absolute
path to the files on the local disk.
Note
Windows users should either escape the backslash characters, or use forward slashes.
For example: "to":"C:\\Users\\USER\\projects\\" or "to":"C:/Users/USER/projects/".
The path translator can find the location of a file on the disk by taking a path from the ldz,
and replacing the from prefix with to.
For example, the path to util_funcs.cpp in an
isoaglib pipeline is /builds/lattix1/isoaglib/library/xgpl_src/IsoAgLib/util/impl/util_funcs.cpp.
/builds/lattix1/ will be replaced by /home/USER/projects/ to obtain the path
/home/USER/projects/isoaglib/library/xgpl_src/IsoAgLib/util/impl/util_funcs.cpp in the workspace.
If the incorrect mapping is given in pathmap, the VSCode Extension will not work as intended,
and the error message “File not found in the Lattix Project” will be given.
Note
If no prefix is to be taken off the ldzpath, then give an empty path “//” for from.
In this case, the “to” prefix will be prepended to each path.